Tuesday, July 29, 2014

DIY Matchbox Car Tracks


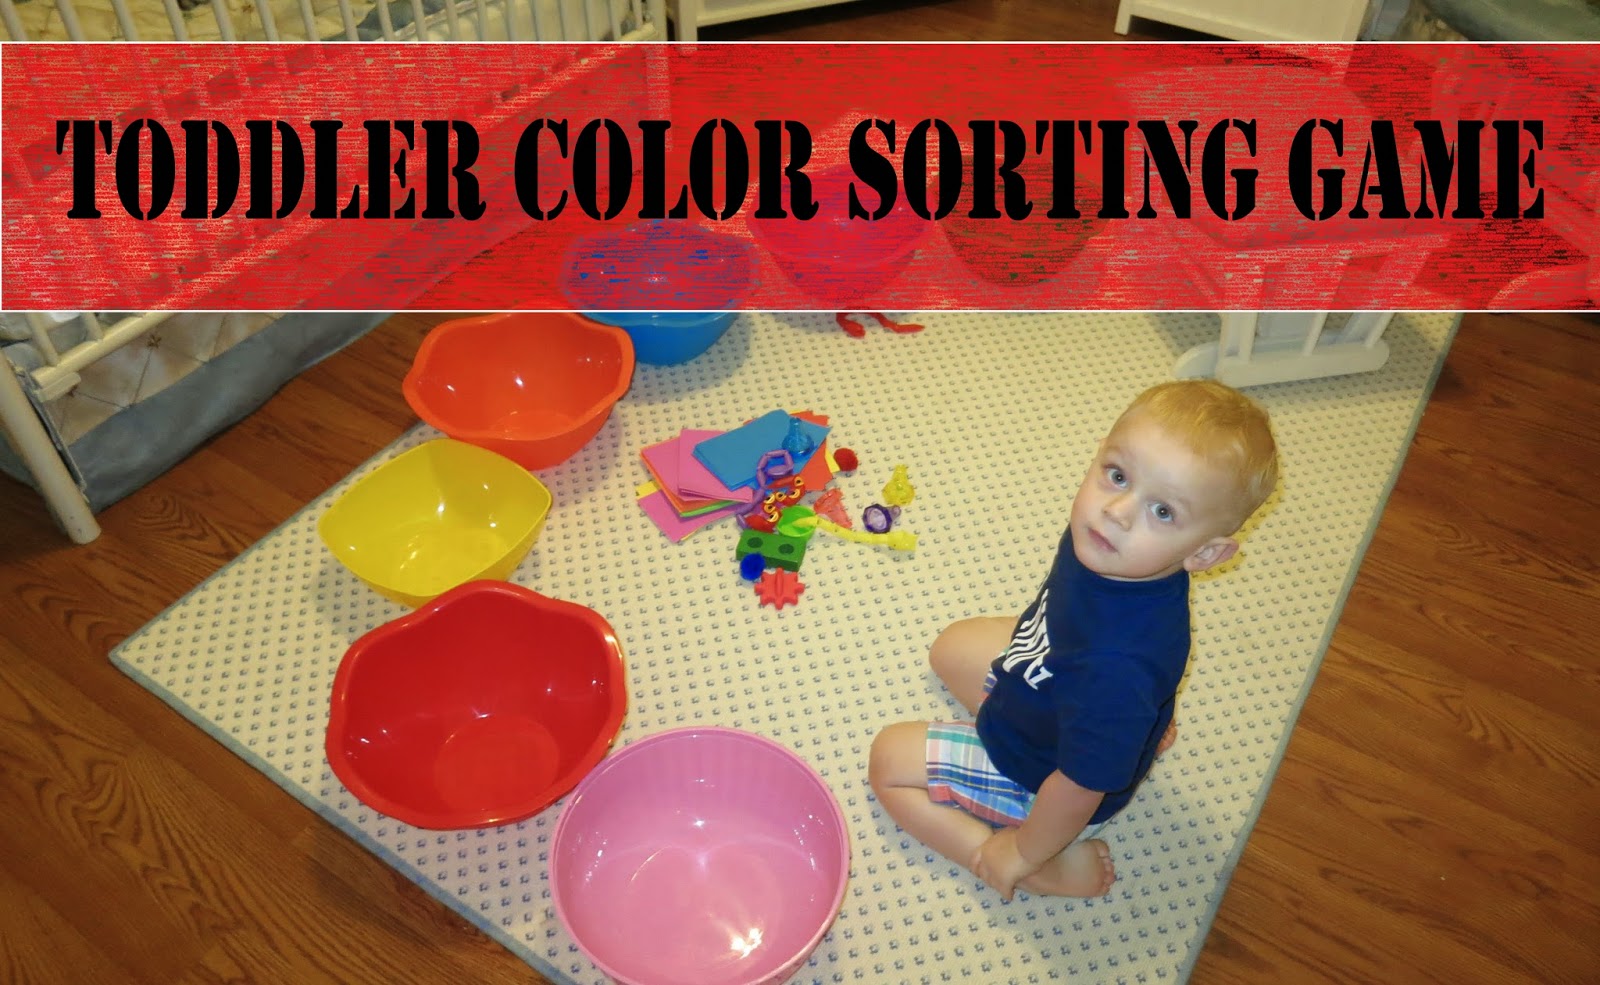
My little guy loves matchbox cars. I mean, he LOVES them. He's not even two years old yet, but he plays with his little cars by the hour. (A guy thing, I guess) We bought the expensive, yet cheap, Matchbox racetracks, and he really didn't play with them for long. He pulled them apart and scattered them about the house. So, I saw an idea on Pinterest and thought I'd give it a try.

First of all, I did this with my toddler in mind. I'm sure 2x4's would be great for older kids for outside play, but I wanted mine to be indoor/outdoor, not too heavy for him and not big enough to cause too much destruction in the house. Here's what you'll need:

1. White Wood Plank Paneling 5/16 x 3 9/16 x 32 inches. I chose these for several reasons: cost, lightweight/thin and  tongue & groove feature allows them to be joined.
2. Paint - I bought a Valspar sample paint from Lowe's - Jet Black PN1090
3. Paintbrushes
4. Painter's Tape
5. Yellow or White Paint for Stripes

The first step is to coat your boards in black paint. It took two coats for me. Once they are completely dry, run two strips of painter's tape up and down the longest section of the board. 

Once they are in position, mark every other inch using a tape measure. 

Next, cut 1 inch strips of painter's tape and lay them on top of the two long strips of tape (the opposite direction) on the two inch marks you've already made. Make sure you press down on every piece of tape for a good seal. 

I used yellow acrylic paint that I had on hand. It got the job done, but I had to do several coats. Hint - Pull your tape up before everything is completely dry. Tacky is best. 

Now your little one is ready for hours of play. These tracks are really great for outside play, and especially perfect for inside on rainy afternoons. They can be adjusted and customized over and over for different tracks. I didn't tell William what I was working on, and when the first one was dry I showed it to him. He joyfully exclaimed, "Track!" (Didn't even know he knew that word). He went right over and immediately started playing with it. 


Gentlemen, start your engines! 

Wednesday, July 23, 2014

Toddler Color Sorting Game


William is doing so well with his colors, but I thought we'd try a learning game that I had tried with him before he really knew what was going on. He did so well with it today, and I love that it is hands on learning for him. 
I went to the dollar store and stocked up on big, brightly colored bowls. I bought a couple bags of party favors in various colors and foam craft pieces. I also found a few colorful, small toys that we had around the house.

 All ready to sort into the bowls.


 Let the sorting fun begin! We had fun counting our color things too. An easy, cheap way to reinforce color recognition.

Friday, July 18, 2014

William's Nautical Bathroom, Part 1


It would have been so helpful to know when we first bought our home, nearly six years ago, that we would have a son. I probably wouldn't have decorated the guest bathroom (now his bathroom) in green and pink shabby chic. So we needed a macho, masculine bathroom. Unfortunately, I didn't prepare for this to be a blog post and I only took one in-between picture.
Here is the before shot:


And here is the one, lonely in-between picture. You can see the paint samples on the wall reflected in the mirror:


And here is the after shot:
 

Some of the details:  

2. Paint: Sherwin William's Croissant #7716  
3. I found these aquatic pictures at Homegoods  months and months before I started to redecorate. In fact, these pictures are what inspired the whole redo, and I decorated around them.


My dear momma came over and between the two of us, we installed the wall trim. FYI We ended up gluing them to the wall. Nails and screws would not keep the boards pulled tight enough to the wall. I love having the hooks now instead of a towel bar that only held decorative "don't touch" towels. So useful!


This dear little sailor is the crowning jewel of the room. I adore him, and I have named him Archibald. My hubby wasn't as thrilled with the new addition to the family, but I think he's grown rather used to him now.

Various doodads I either already had in the house or purchased for the redo. Seashells are a cheap and easy filler when you live so close to the beach. I did bleach them first though.


Now I need your help. There is a large blank space on the back wall, above the shower curtain...the perfect place for an appropriate quote or verse. There are a few decals on etsy that I am considering. I can get them in any color I want, but I just haven't been able to decide. Would you leave your vote for your favorite in the comment section?


Option A - from OldBarnRescueCompany


Option B - from openheartcreations


or Option C - from WelcomingWalls


Please, let me know if you prefer A,B or C. I have a few other things to add before this room will be "finished". Tiling the bathroom floor for one:) Unfortunately, I haven't learned how to DIY tile yet, but I've thought about it :)

Thanks for stopping by!

Monday, July 14, 2014

DIY Candle Rings

If you are like me, you aren't partial to silk ivy decorations. About the only thing positive I can say about ivy, is that it is plentiful;) I mean, it is everywhere! No, no, what I really wanted for my new candelabra were boxwood candle rings. Have you priced those lately?! Well, I did, and they are really expensive. (I now know why boxwood is so scarce, and ivy so plentiful).
So, I set out for Hobby Lobby and bought a sprig of greenery. They didn't have exactly what I wanted, but it was close enough. It was on sale for $8.99. I forgot to take a before picture, but it looked something like this:
 
(picture obtained from Afloral.com 
 
You'll need the following items: greenery, scissors, wire cutters, floral wire and floral tape.


Start out with the length of wire you need to go around your candle, plus add two inches to the front and back. I prefer to cut smaller portions of tape so it doesn't get tangled, but do it however you prefer.  
 
 
Notice how the wire is sticking out of the front - you'll need that for later. Place the end of your sprig against the wire and wrap TIGHTLY with the floral tape. I repeat, tightly! For the first piece, I wind around 4-5 times.    
 
 
Once you have done that, it should look like this:  
 
 
Now a somewhat tricky part, is determining how thick you want the ring to be. Obviously, the fuller you want it to look, the closer you have to overlap the sprigs. Once I wrapped an end I would place another right over top, but slightly further behind and wrap again. Now repeat that process 3,258,145 times and you should be done:) 
 
 
You can see that I place mine close together for a fuller look.  
 
Okay, once you've gotten the length you need, pull the wire ends towards each other to form a circle. Notice the two wire ends sticking out? Cut them to 1-2 inches long.  
 
Now, carefully wrap the extra lengths of wire around the ring to keep it closed and secure. This is a bit tricky, but the nice thing about working with wire is if it doesn't look right you can just unwrap and try again.  
 
 
The ring above was just a sample size for the purposes of this blog. Below is the underside of the ring that I made for my pillar candle. Notice the wire wrapped around to keep it closed?
 
Top view:
 
Side view: 
 
 There they are all together. All that for just $9...less then what I would have paid for a single one!