Saturday, May 16, 2015

Up-cycled Bookshelf

I found this little bookshelf at a yard sale years ago. I'm not sure if Little Man had even been born at that point. I think I paid something like $5 dollars for it, and we've used it for paint storage in the garage for years. Needless to say, it wasn't in great shape. Since Little Man is getting his big boy bedroom, it was the perfect time to tackle this project. (Again, I forgot to get a before picture! Gah!)
The joints were not glued together so I was able to take the screws out and paint one piece at a time. I roughed it up with sand paper before painting. Then I used a roller instead of a paint brush, and I'm telling you, I will never paint another piece of furniture by brush again if I can help it! Using the roller was amazing. The paint went on so smooth and quickly. I'm a big fan! 


I was lucky to have a bright, sunny SoFlo day. My paint dried right away! 


Reassembly was a piece of cake! After I got everything put away on the shelves, it still looked a little bare....what to do???

I took a little trip to JoAnn Fabrics and picked up some gray/silver vinyl adhesive paper for my mom's Criket machine (it's a dream!) 

I chose gray because the walls in Little Man's new bedroom are gray (Valspar's - Comet Dust 5006-1A to be exact) and I thought it would go nicely. 

I love painter's tape, and I use it whenever possible. This time I used it to help mark the center of the board and to help me stay level. 

I love my yard sale find! I'd say the total cost for this up-cycle was less than $15. 

A perfect, personalized place for him to store all of his paper adventures. As Little Man likes to say, 'Once upon a time...."


Monday, March 23, 2015

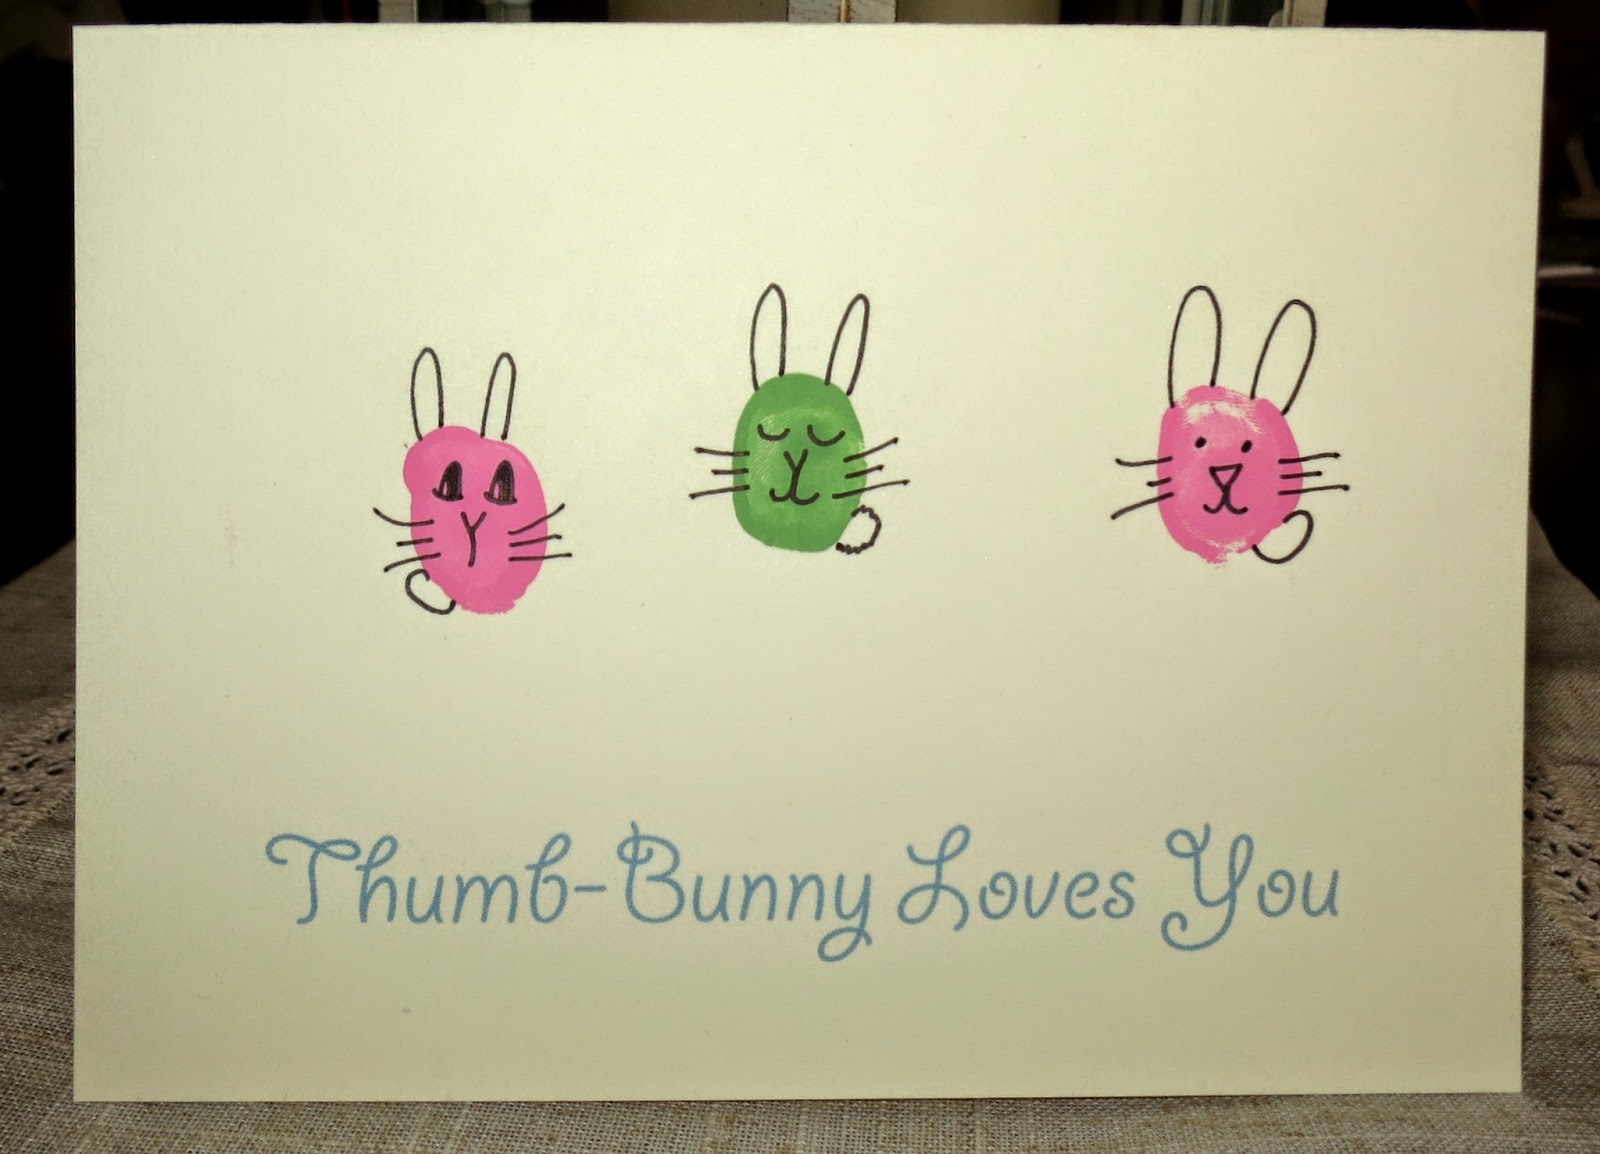
Thumb Bunny Loves You


I love to try new, holiday crafts with Little Man. They are lots of fun for us to do together, and a nice surprise in the mailbox for our out-of-town grandparents and great-grandparents. I actually had some blank stationary left over from a recent baby shower, so I had everything on hand.


I measured my card and typed up what I wanted the card to say using Word. We made five cards, and they were all personalized for the recipients. 

Then (very carefully) set up your crafting/painting area. I feel as though I made a proverbial "deal with the devil" to accomplish this task. Little Man was promised full use of the remaining paint and brushes if he cooperated with stamping his thumb three separate times on all five cards. He cooperated (barely), but had a fantastic time painting once we were done with the cards. 

I put my paint in bowls, but I used a sponge and a brush to apply the paint onto his thumbs. This way the paint wouldn't be a huge glob on the card. I probably brushed too much on anyways. 

I lost some of my in-between photos...my own fault:(  Anyways, after the paint was dry, I drew on little faces, ears and tails. An artist I am not, but it got the job done.  

H"o"ppy Easter!


Tuesday, March 10, 2015

I "Wheelie" Like You

Well, this is a bit late, but better late than never. Maybe this can be an inspiration for next Valentines Day. It's kind of difficult finding a Valentine for boys to give out that isn't cheesy or gross (monsters show affection, right?). I searched Pinterest for ideas, and was not disappointed. I found jollymom's blog and it had exactly what I wanted. She included the free printable link right in the post! For my car obsessed little boy, these Valentines were absolutely perfect. So perfect, in fact, that he gave them to his friends AND received one from mommy and daddy.

After printing off the Valentine (cardstock paper is best) here is what I used:
Ribbon (I think the black/white ribbon looks like a road)
Cars
Hole Puncher
Paper Cutter
Scissors


I'm sure there must be a way to get the template to fit whatever size card you have, but I don't know how to do it. So, I had to cut my paper to fit.

Here is what mine looked like after being trimmed and personalized. 

I placed my car where I wanted it, and made marks so I could see where to punch the holes. 

Then thread the ribbon through. 


All done! 

A great, boy-friendly Valentine gift that is easy to DIY!  

Thanks jollymom for the inspiration and printable! 


Tuesday, December 2, 2014

Mistle"toes"

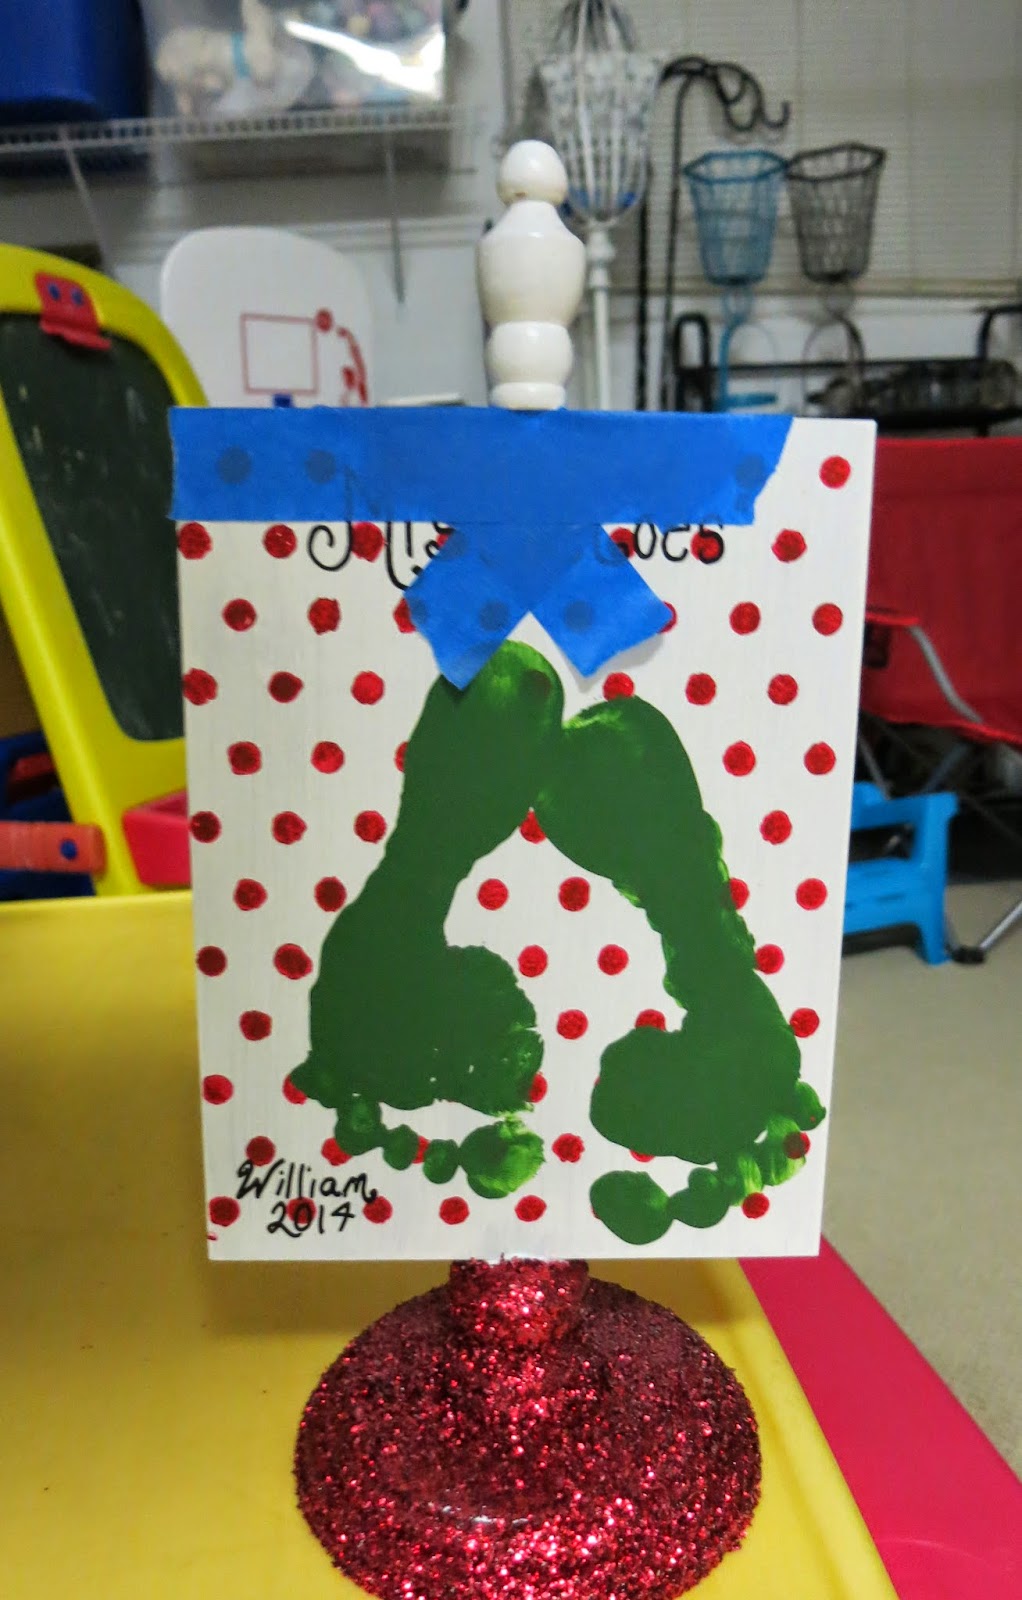
I'm betting you have seen the mistle"toe" foot print craft all over Pinterest. Well, here's another one, but with my spin on it.


If you want to do it exactly like I did, here's what you'll need:
Table Sign 
Spray paint
Acrylic craft paint
Glitter
Elmer's spray adhesive
Hot glue gun
Ribbon
Jingle Bells
Paint Brushes
Stencil
Wire
Clear nail polish (I'll explain)

I was strolling through Hobby Lobby looking for inspiration, and I found unfinished wood table signs. Perfect! I also grabbed some unfinished wooden picture frames (easier to ship) for out-of-town grandparents. I didn't think to take a picture of the blank table sign...oops!

First I trimmed the back of the frames with painter's tape so the spray paint wouldn't bleed onto the back (it didn't stop it completely, but oh well)
Then I spray painted, but I didn't realize how unfinished wood sucks up paint. It's like a sponge! I had to go over it with a paintbrush. Once it was sufficiently coated white, I taped my stencil on with painter's tape and used a sponge brush to apply my acrylic paint. (I had to share my craft space with a somewhat meddlesome, little coworker)


Once my paint was dry, I taped around the bottom  of the pedestal. Then I coated it with Elmer's adhesive spray and sprinkled with glitter. If you find a non-messy way of doing this, PLEASE tell me. I noticed that the glitter kept falling off after that, and so I decided to spray again with glue after the glitter was applied. Unfortunately, it did dull the shine a bit, but I'd rather have dull glitter than patchy, bald spots of glitter.  


Then I recruited help for the footprints. I was the most nervous about this step, because two year old boys are known to be rambunctious and unpredictable. I need not have worried. Little Man did splendidly! He thought it tickled, and I gave him a huge lollipop to distract him.
* Helpful hint* I put him in his booster seat (so he couldn't run away), and I used a plastic bag to shield the chair from the paint. 


After  the paint dried (again), I taped off the top decorative piece and painted it with metallic, gold, acrylic paint. Also, I used a black paint pen for the lettering. 


Relax you're almost done! Here's the last step: Make a bow around a piece of wire. After you've made the bow, string the bells onto the wire, twist closed and snip the excess. 


After you've got the bow just the way you want it, use clear nail polish to keep the ends of the ribbon from unraveling. Once that is done, use a hot glue gun to secure the bow in place. 


Viola! Here are the finished products of Little Man's Christmas craft! 


Wednesday, October 29, 2014

Zizzle Zazzle Personalized T-shirt Giveaway


For his 2nd birthday my Little Man shared his Elmo themed birthday party with his great-grandma. I knew I wanted to get him a personalized shirt for the occasion, and Zizzle Zazzle had just what I needed. I ordered my iron-on decals for his shirt, and spoke with the shop owner, and she made me a customized 70th decal for great-grandma. I loved it! I did my best to get a clear picture of the birthday boy and girl in their matching shirt's, but Little Man just wouldn't cooperate.

How cute are they?!!!

Here's a clearer shot of the shirt, but his face is kinda fuzzy:( 


ZizzleZazzle is giving away one T-SHIRT WITH PERSONALIZED DECAL, and you will not believe the selection you can choose from: Frozen, Cars, Princess Sofia, Jake and the Neverland Pirates, Monsters Inc., CareBears, etc...16 pages of options to choose from!!! Hurry and enter the giveaway! your birthday boy or girl will love it!

Personalized T-Shirt from Zizzle Zazzle

Sunday, October 5, 2014

Nannie's Quiet Book

Full Disclosure* This is my mom's DIY project. I freely admit that she is the Master DIYer, but this was just too great a project not to share. She presented it to him for his 2nd birthday:) 

Unfortunately, since this wasn't my project, I didn't take pictures of the steps along the way, but at least you can glean inspiration from the finished project, If you have a question about anything in particular, leave me a comment, and I will do my best to get an answer from her for you. I am including links to the end of the post for some of the sites she visited for ideas. 

Warning! She said she thought this would a weekend project, but it took weeks. These take time. 

I present to you, a labor of love....
 Book cover courtesy of Mom's embroidery machine. 


The first page featured a mirror covered by hand embroidered life-size hands. Perfect for playing peekaboo with yourself. Not gonna lie, Little Man quite likes to admire his reflection. So this page is a big hit.
 Super cool idea, huh?

Next on the list, the farm pages. Not only are these super cute with a functioning barn door, they are (again) hand embroidered, and magnetic! 

 I'm posting a close-up so you can see the amazing detail that was put into every piece, 

Count along with the movable beads! 

This is so super cute, and I just love it! In the pocket are various accessories Little Man can use to change his look. 

I especially like the Miami Marlins hat. Go Fish! 

At last, the whole reason for this project! Little Man really really loves this page. It's amazing to have during church! 


Left: Page has a movable boat (pull the ribbon either way), and it is even christened after Little Man himself. 
Right: This page features snaps and a zipper for motor skill development. Oh, yah, it's super cute too.  

I feel like these two pages are the highlight of the book. They show amazing skill and dedication. It's stunning. First, you have a fish net to contain the hand-embroidered finger puppets and a marine background on the opposite side. 

Wait until you see the close-up shots of the puppets! 

This yellow submarine has windows! Somehow, she used clear plastic to create actual portholes. I wish they had shown up in the pictures though.
 This squid is one of my favorites! It so groovy! 
 Seagull with fish in his beak. 
 Maybe the most detailed of all. Look at all that embroidery! 

Another stunning set. Where to start: the button wheels that can be put on and taken off, the opening door, the finger puppets?! There's simply too much! 
 Check out that mane! Like, Seriously! 

The last page has movable automobiles for my car obsessed son. 
Just pull the ribbons either direction to move them.

My husband works for UPS, and she made a "Daddy's Truck", as it is known around our house, for Little Man. It even has a real "glass" door! 

This says it all. Thank you so much, mom, for this amazing keepsake. 

Nannie (as he calls her), Little Man & Pawpa checking out his birthday book! 

Links for ideas: 
http://rigierukodelki.blogspot.com/2012/04/blog-post_04.html#more 
http://tom-toy.blogspot.co.il/2014/06/quiet-book-for-annabelle.html
http://www.imagineourlife.com/2011/09/27/circus-train-quiet-book-page/
http://bugsandfishes.blogspot.com/2014/06/guest-post-felt-ocean-finger-puppets.html
http://www.sewcando.com/2009/09/quiet-time-part-2-quiet-books-abound.html
http://homemadebyjill.blogspot.com/p/templates-printables.html